Category Archives: Gift Wrap + Packaging

Gift Wrap: Poinsettia

December 17, 2015

Filed Under : Gift Wrap + Packaging - Paper Projects

paper poinsettia gift wrap via ANASTASIA MARIE

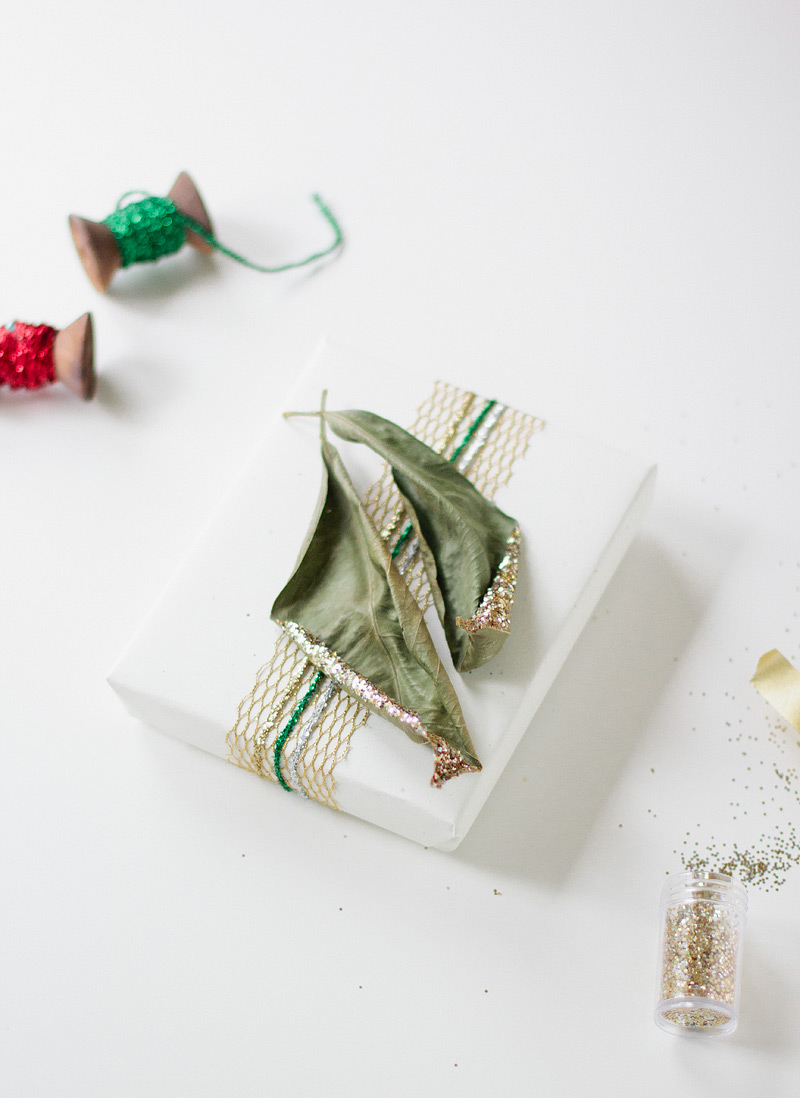
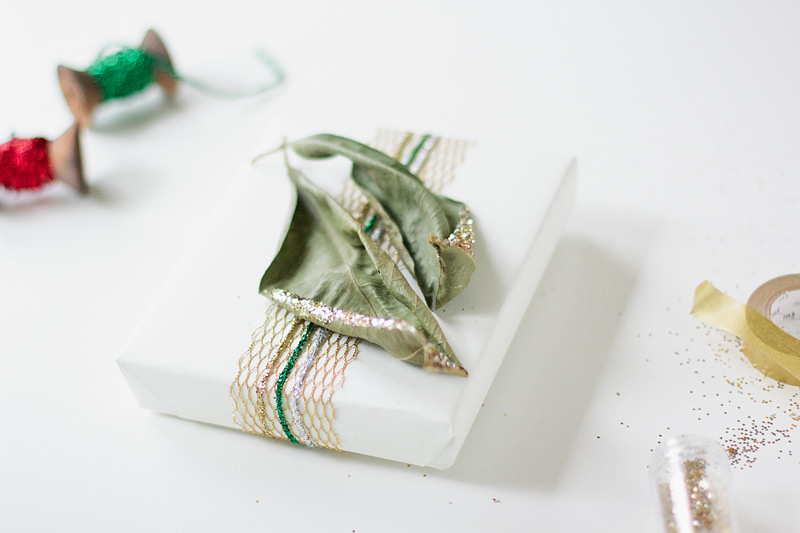
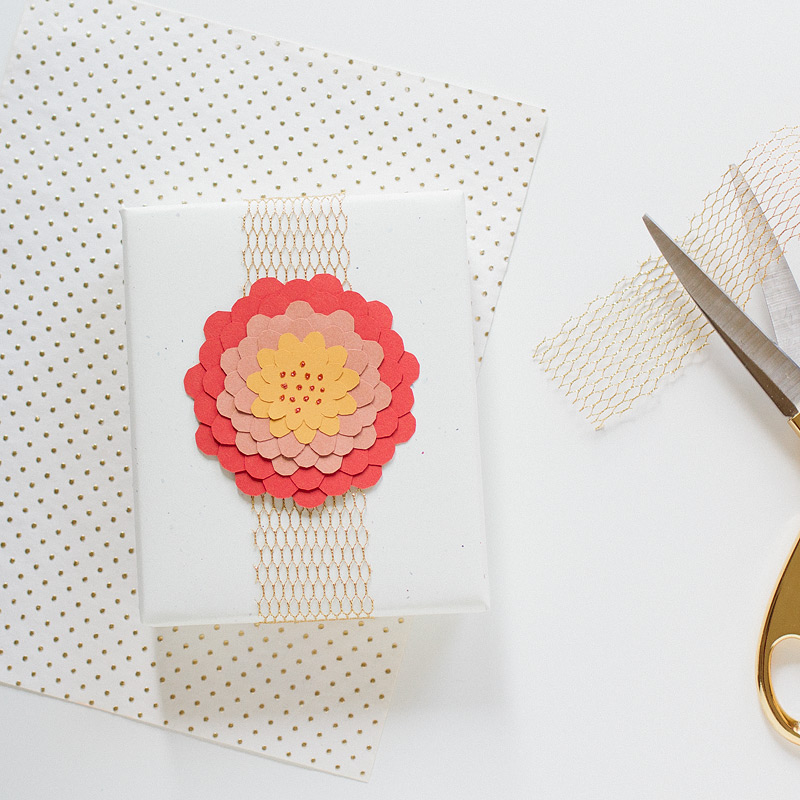
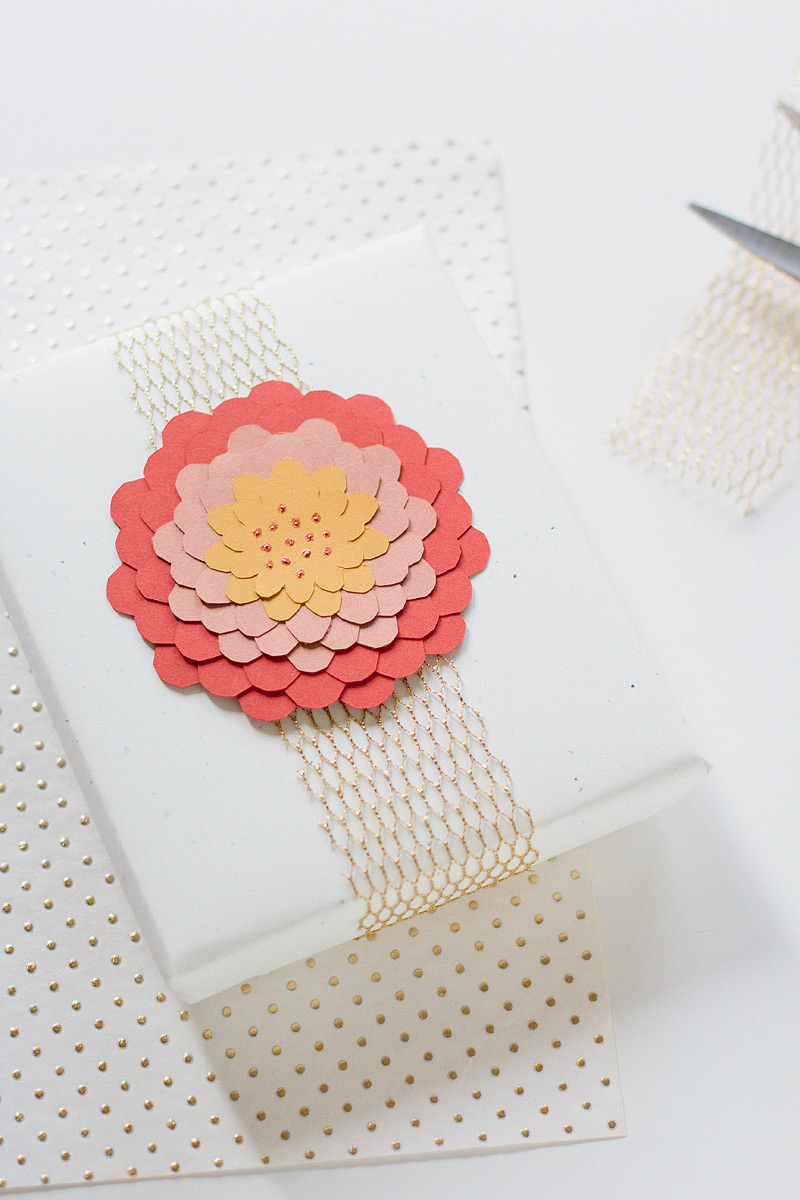
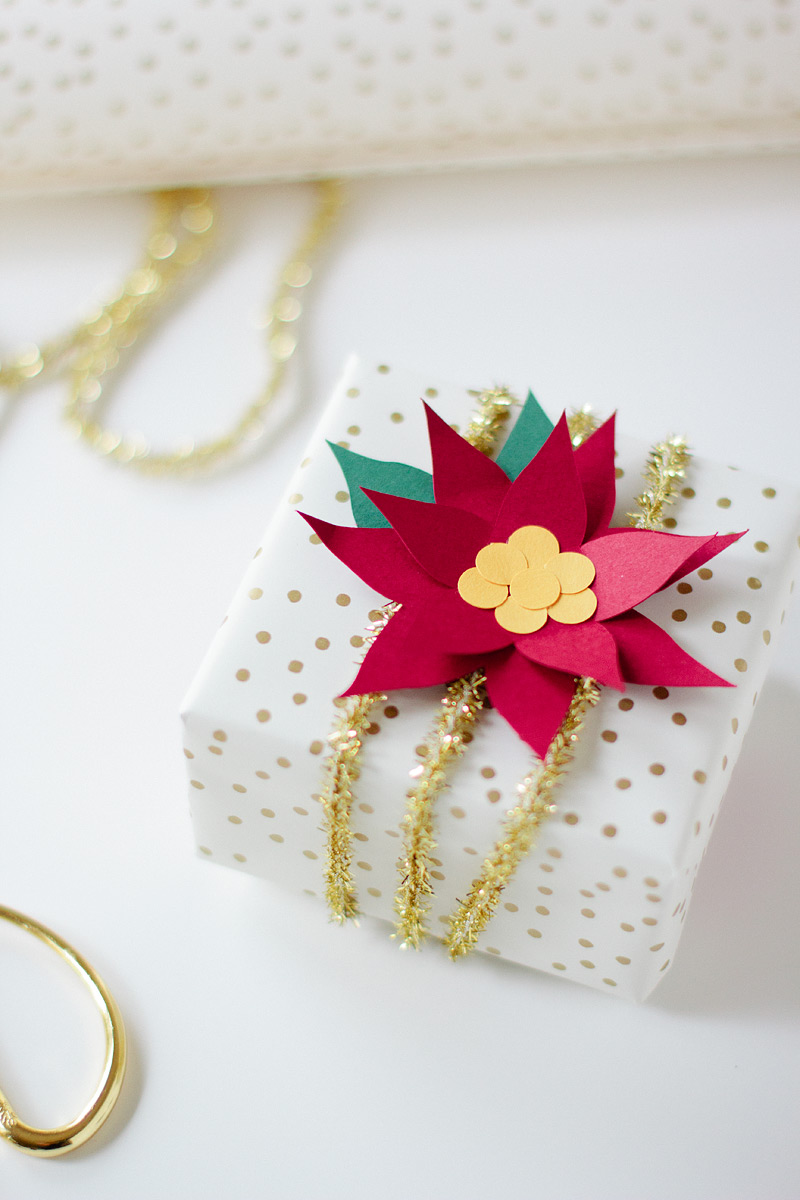
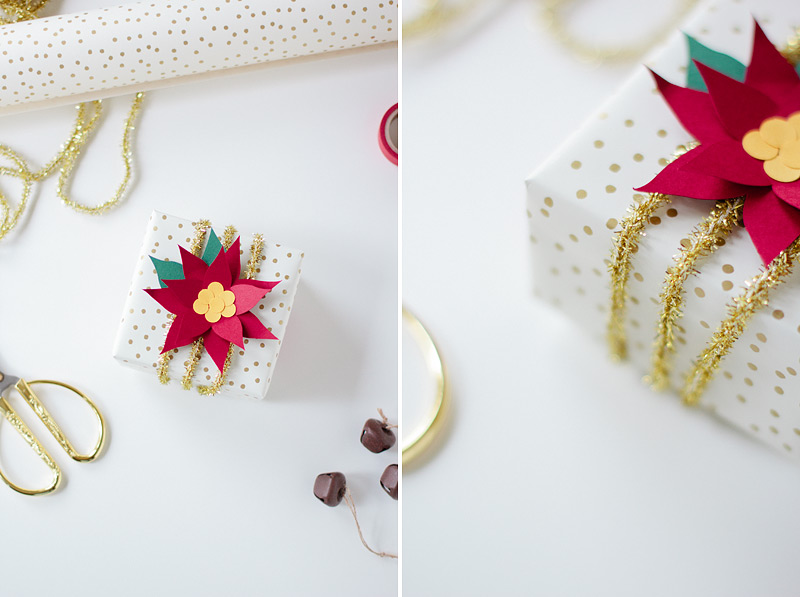
Poinsettias are well known as the flower of Christmas. It’s my first time putting one in my own home and I was inspired to create a paper version for one of my gift wrap posts. To recreate this look, you’ll need the following:
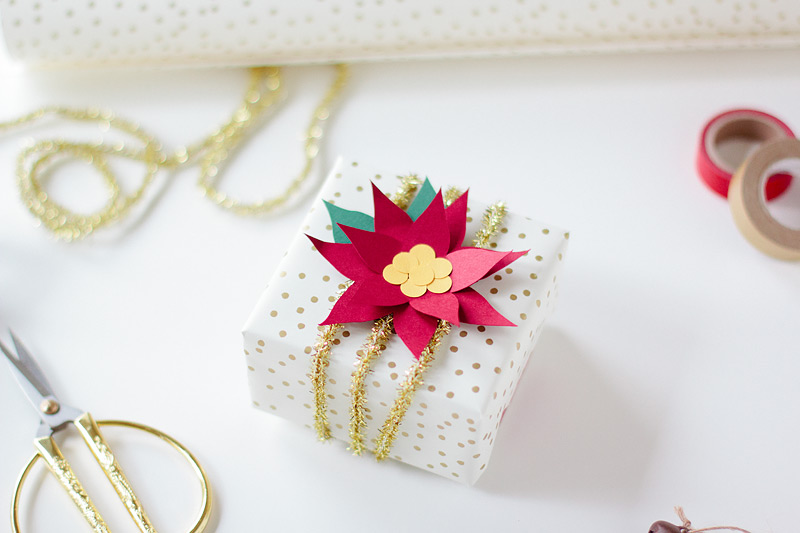
Kraft box
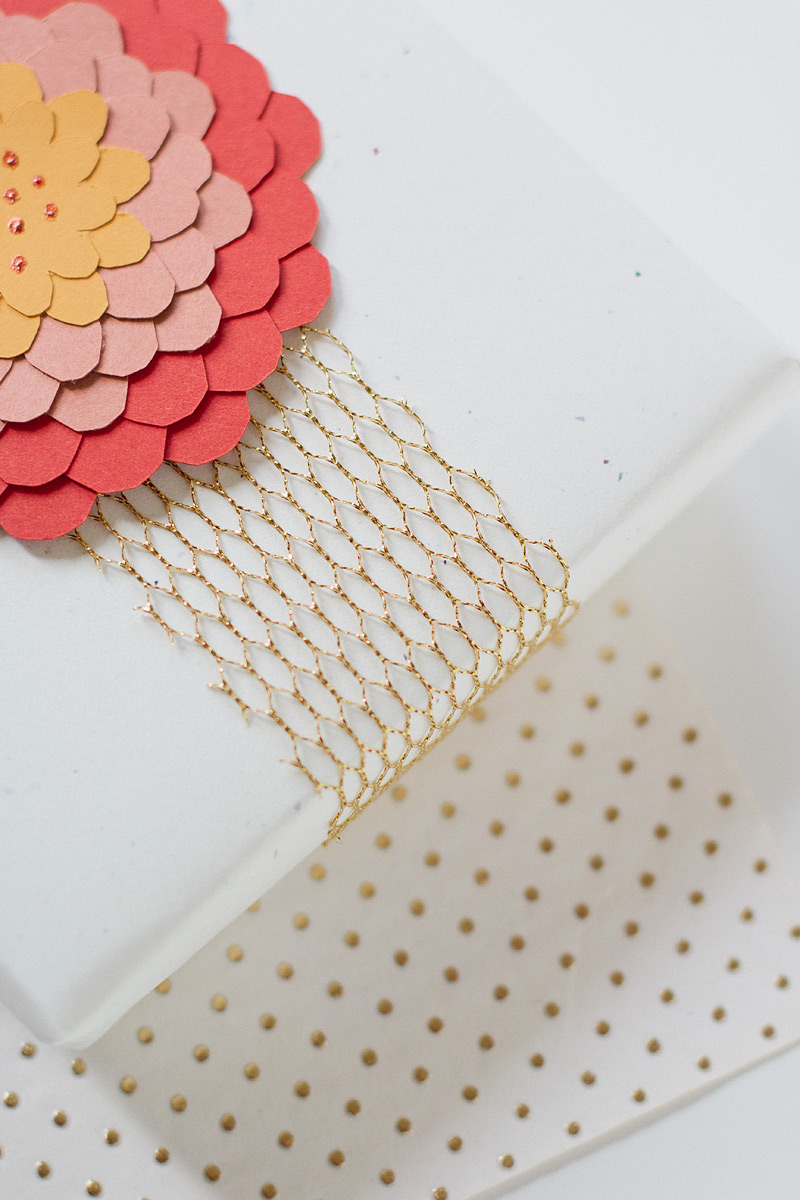
White + gold dotted wrapping paper
Berry red cardstock
Emerald green cardstock
Golden yellow cardstock
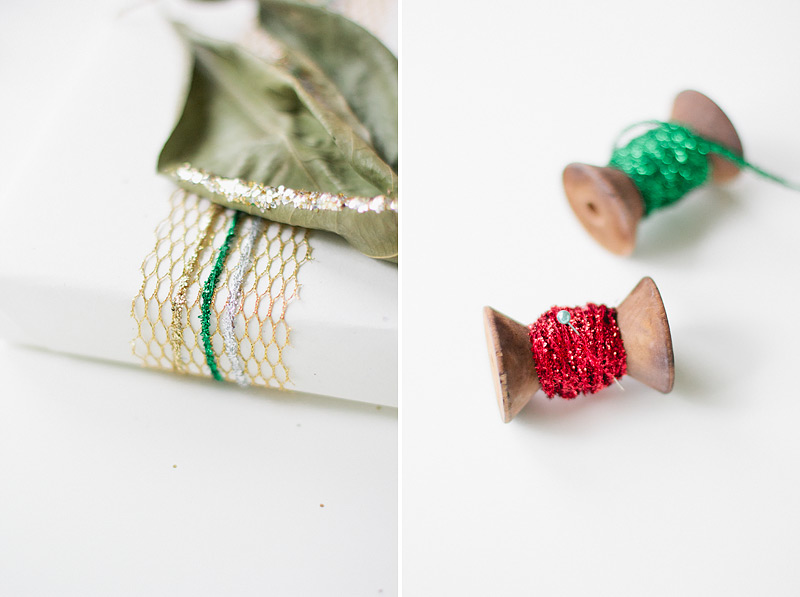
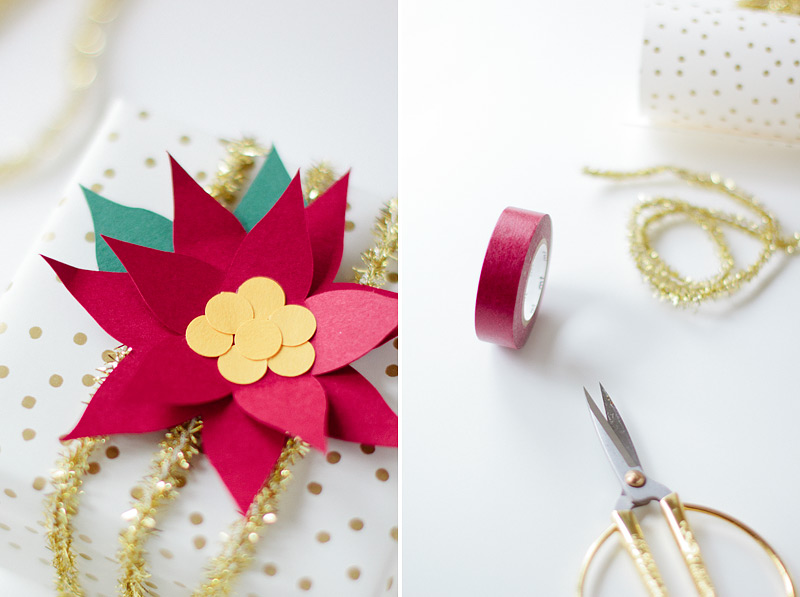
Gold tinsel
Berry red washi tape (if desired to prettify the wrapping paper flaps)

Glue
Mounting tape
Scissors
Tape

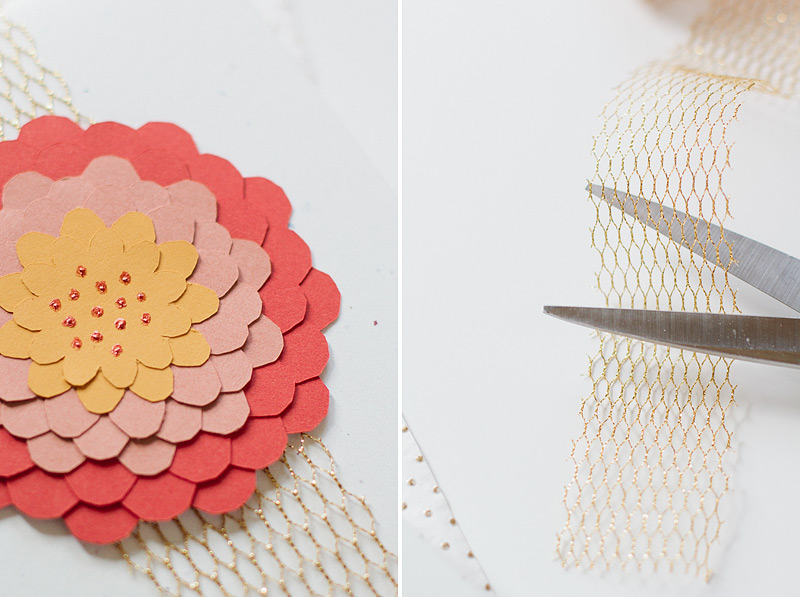
Start by cutting out two poinsettia silhouettes from the red cardstock, one smaller and slightly varied from the other. Then cut leaves from the green and seven small circles from the yellow. Glue the two poinsettia together and slightly bend the petals up to create definition. Glue the leaves on the back and arrange the circles in the middle of the poinsettia.

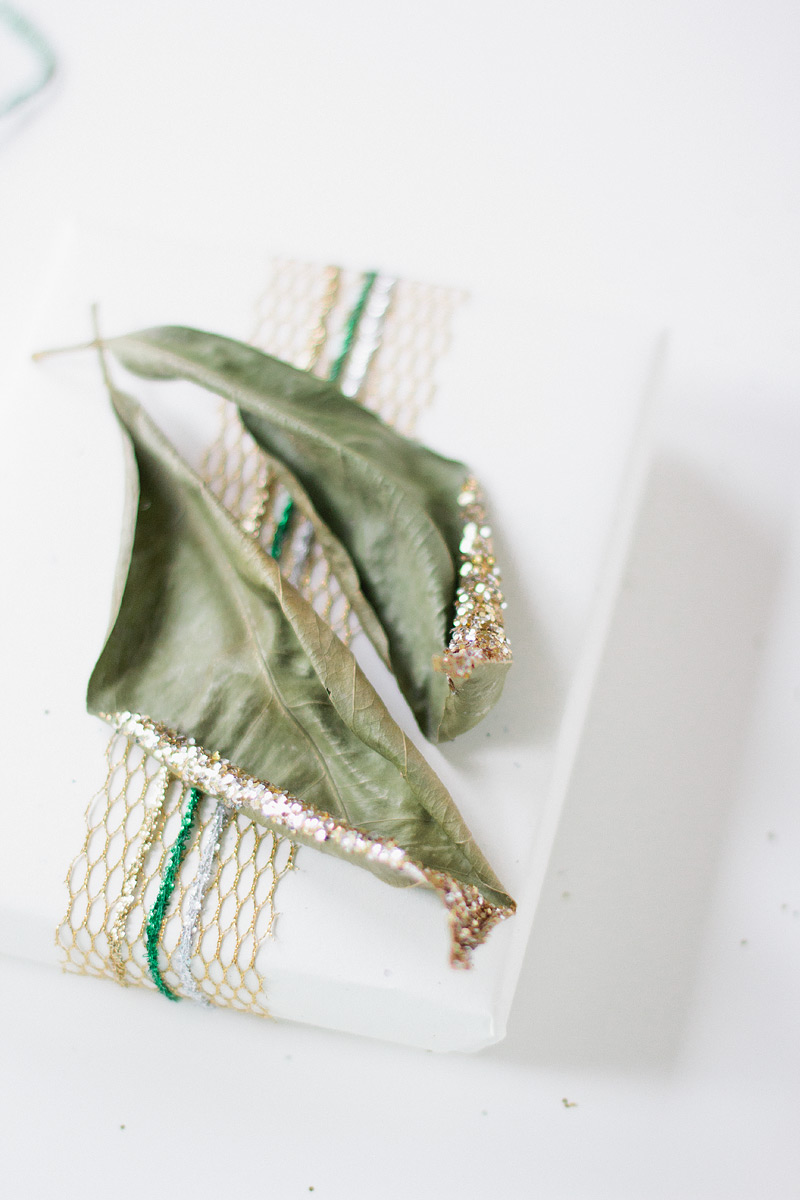
After your box is wrapped in the wrapping paper, wind the tinsel around the box three times and secure on the bottom with a small knot. Cut itty strips of mounting tape and place two pieces in between the strands of tinsel. Add another layer or two of the mounting tape until your “mound” is just as tall as your tinsel. Secure the paper poinsettia on the tape.

paper poinsettia gift wrap via ANASTASIA MARIE paper poinsettia gift wrap via ANASTASIA MARIE paper poinsettia gift wrap via ANASTASIA MARIE

See more of this year’s holiday gift wrap ideas here:
Glitter Stripe Noble
Mandarin Leaves

Gift Wrap: Mandarin Leaves

December 15, 2015

Filed Under : Gift Wrap + Packaging - Paper Projects

gift wrap: mandarin leaves via ANASTASIA MARIE

This one is for all you mandarin lovers. I eat the fruit day in and day out during wintertime and it’s only fair that I dedicate a gift wrap post to one of the best things about winter. Here’s what you need to recreate this look:

Kraft box
Speckled white wrapping paper
Mandarin leaves (fresh is best because it’s not so fragile, but I’m using dried ones and they still look beautiful)
Chunky glitter in a gold/silver mix
Wide gold mesh ribbon
Gold glitter string
Green glitter string
Silver glitter string

ModPodge
Foam brush
Scissors
Tape

Wrap the kraft box in the wrapping paper. Wrap a piece of the wide gold ribbon around the box and secure the two ends on the back with a touch of glue. Let dry before flipping over. While it’s drying, apply some glue to the curled edges of the mandarin leaves. Top off with glitter and shake off the excess. Let dry.

When the wide ribbon has set, take a piece of each of the three glitter strings and wrap once around the box, layering over the wide ribbon. Secure each strand on the back with a small knot. Once the leaves have dried, glue them them onto the top of the box over the layered ribbon and voila, you are done!

gift wrap: mandarin leaves via ANASTASIA MARIEgift wrap: mandarin leaves via ANASTASIA MARIEgift wrap: mandarin leaves via ANASTASIA MARIE

See more of this year’s holiday gift wrap ideas here:
Glitter Stripe Noble

Gift Wrap: Glitter Stripe Noble

December 3, 2015

Filed Under : Gift Wrap + Packaging - Paper Projects

christmas gift wrap // glitter stripe noble

That time of year has come again. Yes! I’m going to start posting lots of Christmas gift wrap ideas, starting with this one that uses leftovers from my tree. We got a huge one this year and there’s plenty of these itty twigs around.

Paperless gift wrapping is something that many look to when it comes to wrapping because it’s true, if you don’t have a knack for perfect wrapped corners, your gift can end up looking worse wrapped than unwrapped. To recreate this paperless wrap idea, here’s what you need:

Kraft box
Gold glitter tape
Emerald green satin ribbon
Fine gold glitter
Twigs from your tree

ModPodge
Sponge applicator
Scissors

Start by apply a spot of glue on the edges of the needles of your twigs with the sponge. Apply the glitter and shake off the excess. While that’s drying, take the lid off your kraft box and carefully apply strips of the glitter tape diagonally across the top, folding the ends under the lid. You can try keeping the spaces between them equal or use variation for a more handmade look. Place the lid back on the box and wrap your ribbon around it three times, securing with a small knot on the back. Once your twigs are dried, simply slip them under the topmost strand of ribbon.

christmas gift wrap // glitter stripe noble

Gift Wrap: Printed Photo

November 17, 2015

Filed Under : Gift Wrap + Packaging - Paper Projects

printed photo gift wrap via ANASTASIA MARIE

A printed photo will always be a meaningful touch. Whether it graces a wall in your home, the dresser in your bedroom, the pocket of your wallet, or even a wrapped gift. In our digital world, less and less is getting printed by the year, but as a paper lover, I doubt I will ever do everything digital. I recently had some photos printed on matte paper so I could have pictures of Henry growing up scattered around the house or given as gifts to family. Today, as we’ve seen many before me do it too, I’m dedicating a gift wrap post to the idea of putting a printed photo on your wrapped gift — not because it’s a new idea, but just to encourage you to do it this year, whether it be for Thanksgiving, Christmas, or the New Year. Embrace your life; put your memories into print.

printed photo gift wrap via ANASTASIA MARIE printed photo gift wrap via ANASTASIA MARIE printed photo gift wrap via ANASTASIA MARIE printed photo gift wrap via ANASTASIA MARIE

And for those of you who are curious, the photos were printed with Artifact Uprising.

Gift Wrap: Paper Dahlia

October 15, 2015

Filed Under : Gift Wrap + Packaging - Paper Projects

paper dahlia gift wrap via ANASTASIA MARIE

Paper flowers will always be a favorite of mine. Today, we have dahlias! To recreate this look, you’ll need the following:

Ivory speckled wrapping paper (I used a sheet of scrapbooking paper from Michaels)
Card stock in three shades of fall colors
Copper/brown puff glue
Wide gold net ribbon

Scissors
Double-sided tape
Mounting tape
Tacky Glue

Cut out eight dahlia silhouettes from the card stock, each one just smaller than the last. Your larger three should be from your darker colored card stock, the next three from your middle colored one, and the last two from your lightest one. Glue them on top of each other from largest to smallest, rotating each layer just a bit to create fullness in the dahlia. Then take your puff glue and apply several dots in the middle and let dry.

While the flower is drying, wrap your boxed gift in the wrapping paper. Then cut a strip of the gold net ribbon just long enough for the ends to slightly overlap on the back of the wrapped gift. Glue the ends down with a few dabs of glue. Once the flower is dry, place a small square of mounting tape on the back of it and secure it on the front of the wrapped gift in the middle. Done!

paper dahlia gift wrap via ANASTASIA MARIE paper dahlia gift wrap via ANASTASIA MARIE paper dahlia gift wrap via ANASTASIA MARIE