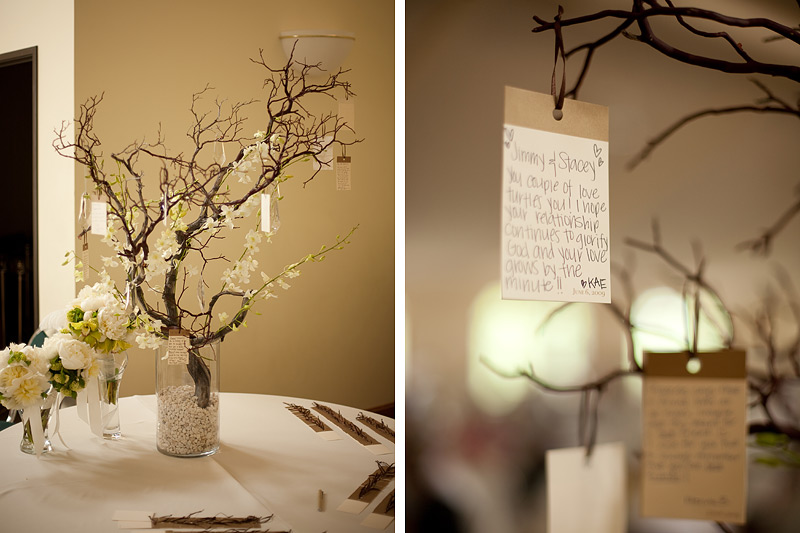
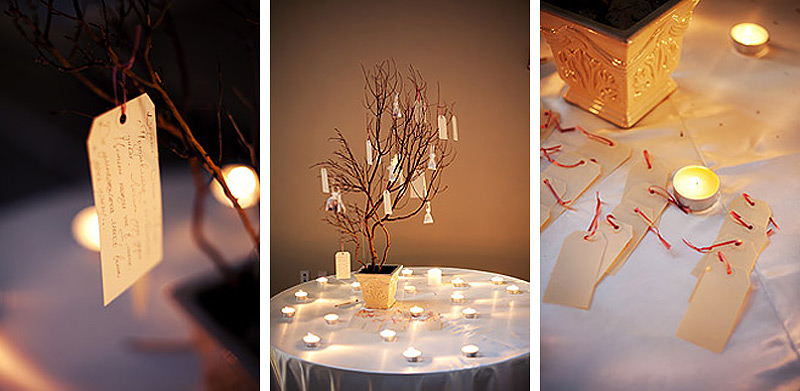
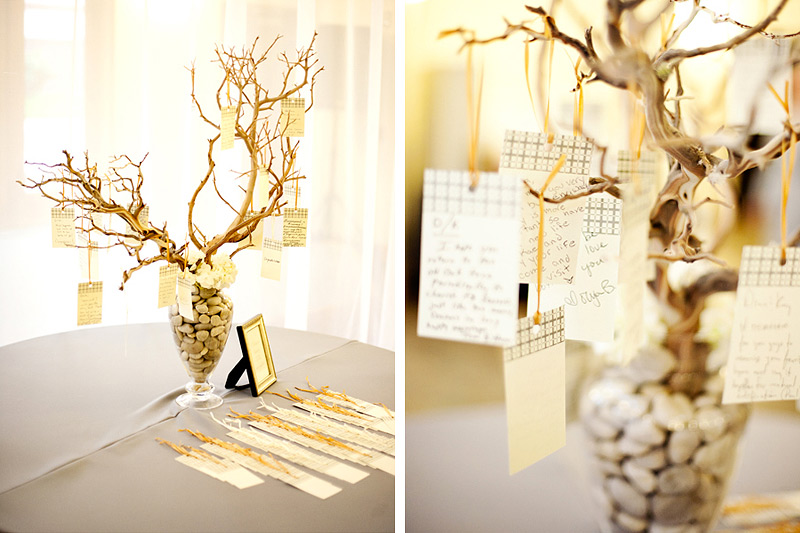
After assembling my blessing tree for my wedding, and then falling in love with the idea even more, it’s a real joy to see this fun alternative to a guest book pop up at other weddings. Guests are provided with tags and writing utensils. A special message for the bride and groom is scribbled down, and then the tag is hung on the branchy tree. I even once passed on some of my extra wedding tags for a bridal shower. This idea can be used for so many types of events…


{image one: my wedding; image two: alla + daniel’s wedding; image three: kae + dmitriy’s wedding…all images by Daniel Usenko}
And all you really need is some branches, a vase or pot, and tags to pull it off. Little blooms or other hanging decorative items are always a extra plus. So let’s make some tags together. I’ll show you two different ideas: IDEA ONE ~ embossed and IDEA TWO ~ ribbon-tied.

WHAT YOU NEED: 1 hole-punched tags | 2 pretty paper | 3 hole punch | 4 pretty edged scissors | 5 double-sided tape| 6 embossing powder | 7 stamp | 8 ink | 9 scissors | 10 ribbon NOT PICTURED: {you’ll also need a heat tool and a blank sheet of printer paper}

STEP ONE: Get your tags.
You can either create your own tags by hand or buy pre-made tags. If you’re making your own, feel free to punch your holes at this stage.
Once you pick out your tag base, cut from your pretty paper a rectangle just slightly wider than your tag. Use decorative scissors to create a pretty cut on one of the longer sides of your cut-out.

STEP TWO {of IDEA ONE ~ embossed}: Stamp your message.
I like to use white ink for these types of things. That way you don’t see unwanted color peeking through.
Take a blank sheet of printer paper and slip it underneath your tag. Stamp your little message in the lower left-hand corner of your tag.

STEP THREE {of IDEA ONE ~ embossed}: Emboss.
Sprinkle your embossing powder over the stamped area until it’s fully covered. You’ll need to do this before the stamp ink dries up, so don’t dawdle after you make your stamp. Shake off the excess, and use the blank sheet of printer paper to scoop the remaining embossing powder back into its container. Use your heat tool to melt the embossing powder.

STEP FOUR {of IDEA ONE ~ embossed}: Beautify.
Take your pretty paper cut-out and secure it with double stick tape at the top of the tag. Cover about 1″ of the tag top with the scalloped edge facing downward. Trim any overhanging paper, and re-punch your tag hole.

STEP TWO {of IDEA TWO ~ ribbon-tied}: Beautify.
This one is super easy…
Take your pretty paper cut-out and secure it with double stick tape at the bottom of the tag. Cover about 1″ of the tag bottom with the scalloped edge facing upward. Trim any overhanging paper. Take your ribbon and tie a mini bow around the bottom portion of the tag. I chose a gold metallic string for this to match the sparkly pretty paper.

FINAL STEP: Tie a loop.
Pick out some coordinating ribbon/string and tie a loop around the punched hole. Knot your ends and trim.

AND YOU’RE FINISHED! Enjoy your event and your brand new tags!


