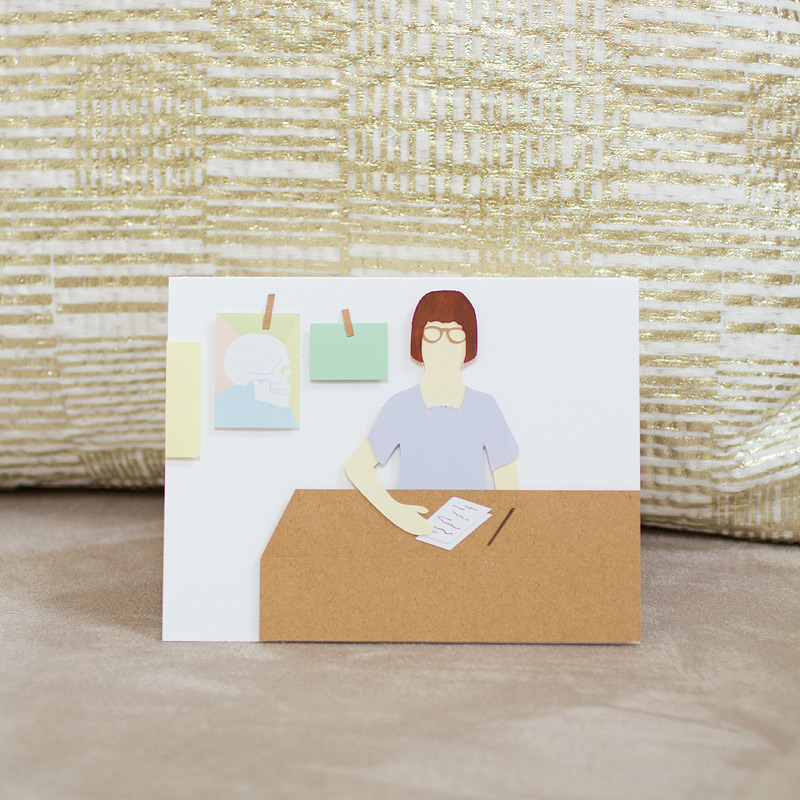
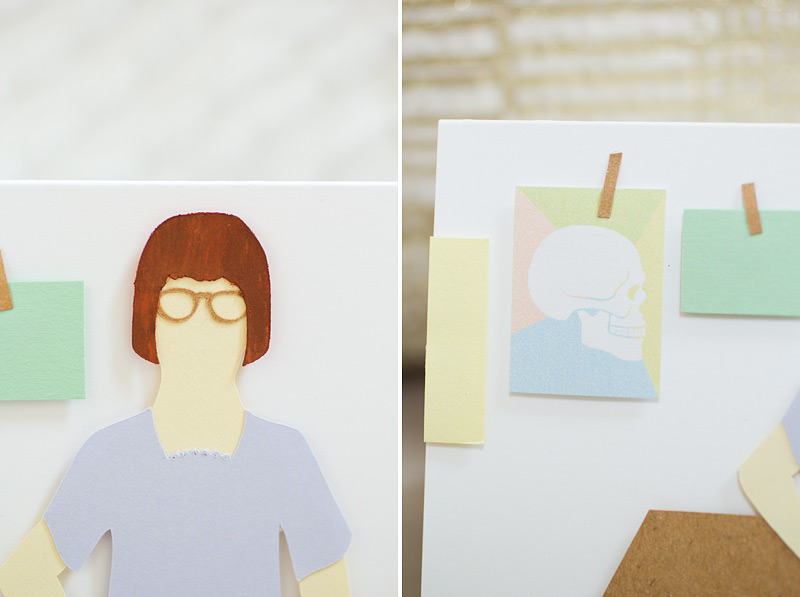
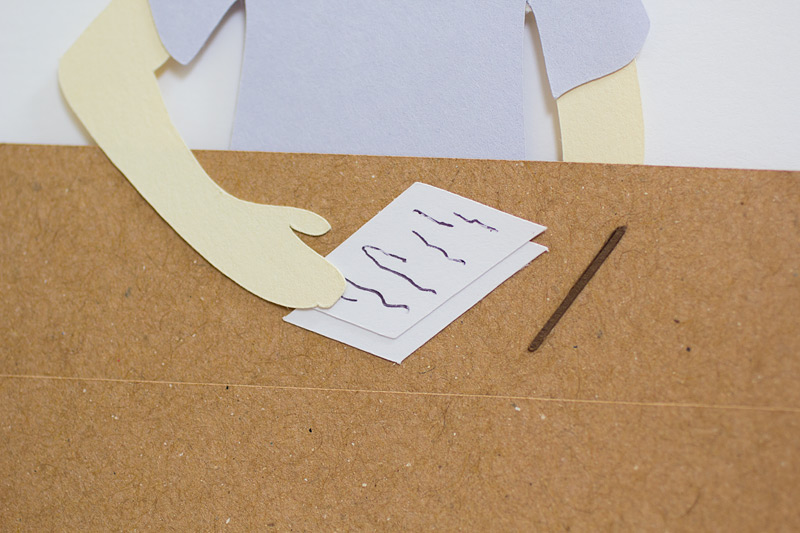
This custom card, made up with 14 different pieces, was created by a student to give to her teacher, a forensic dentist. See more of my custom cards here.

August 13, 2015
Filed Under : Cards - Paper Projects
This custom card, made up with 14 different pieces, was created by a student to give to her teacher, a forensic dentist. See more of my custom cards here.
August 10, 2015
Filed Under : Invitations - Paper Projects - Wedding
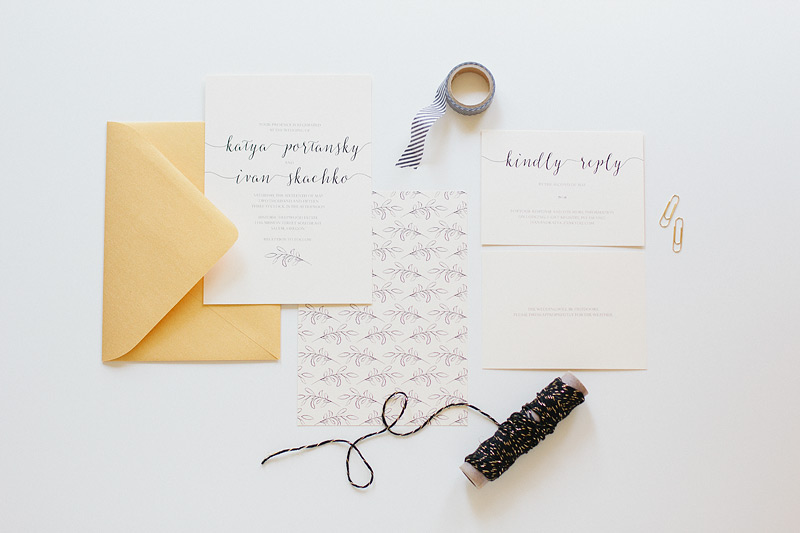
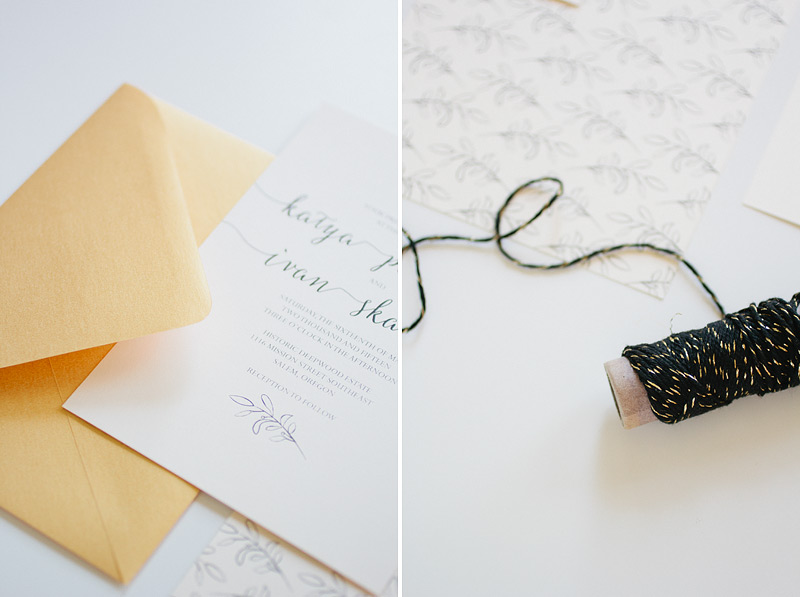
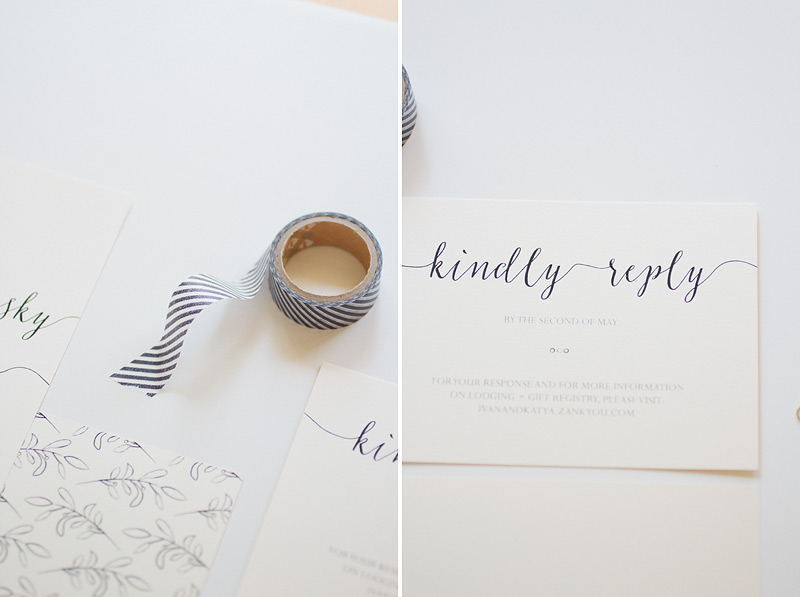
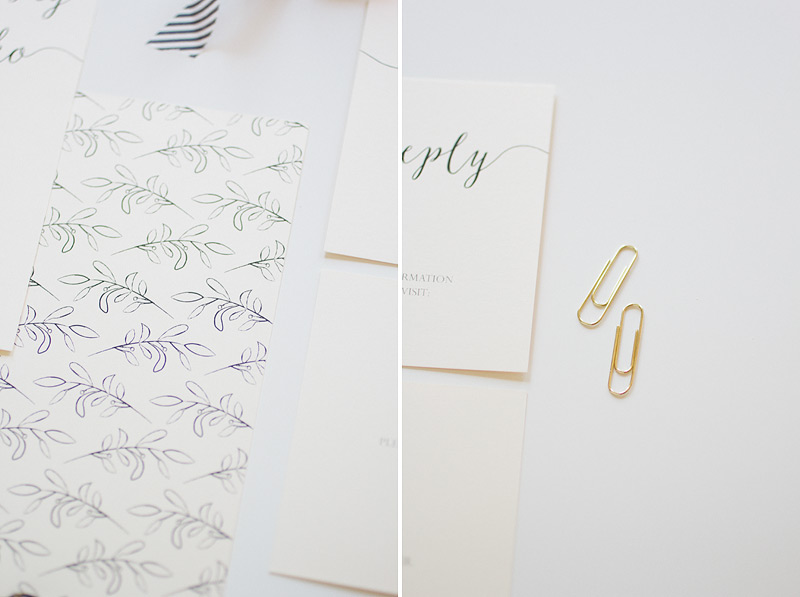
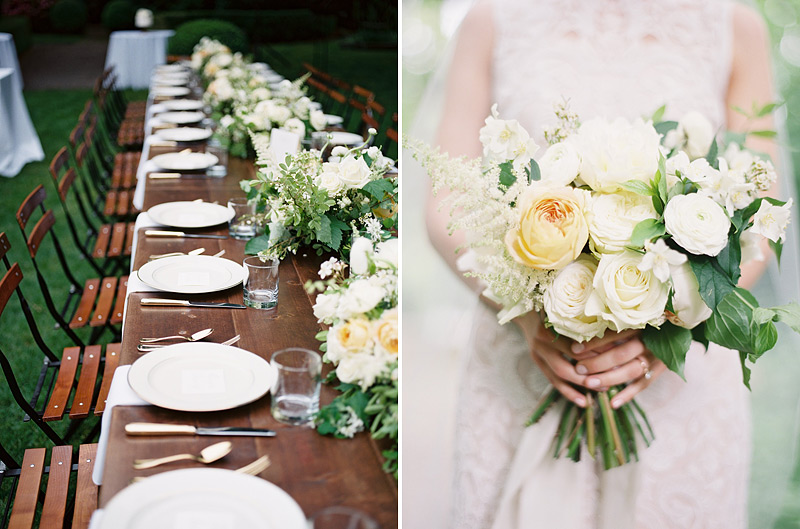
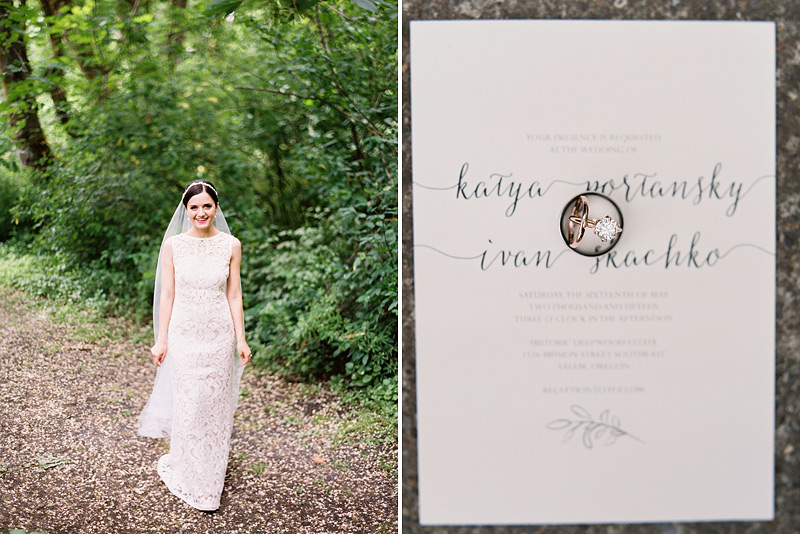
This was the first set of custom wedding invitations I’d done since I took an extended break because of Henry. I had to come out of hiding for my sister’s wedding, right? I shot their engagement photos and had to conclude it by creating their invitation suite.
This set featured a simple leafy twig pattern and type. Printed on smooth creamy ivory paper with black ink and paired with shimmering gold envelopes, metallic gold/black twine, and black striped washi tape — this set came out just as I dreamed it up. You can view some of their wedding photos here.
Oh, and guess what? You can actually customize this invitation suite for your own wedding via my Shop. That’s how much I loved how it all turned out.

Filed Under : Invitations - Wedding
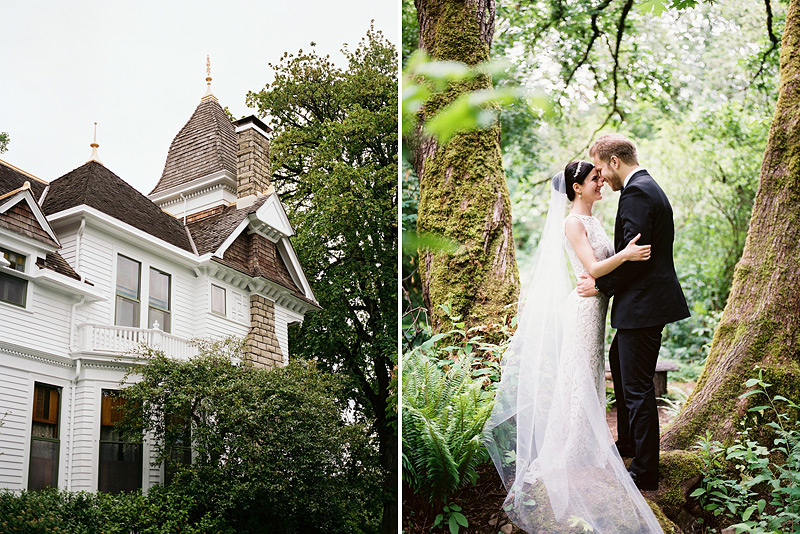
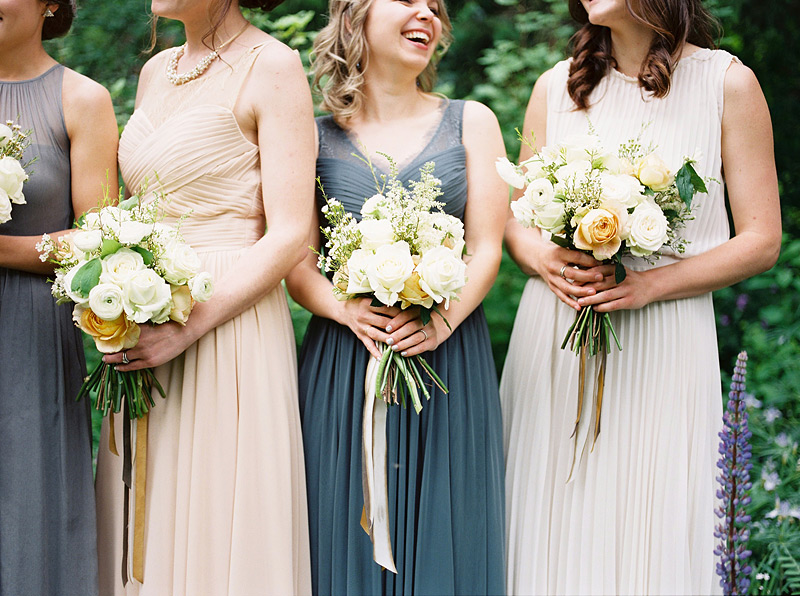
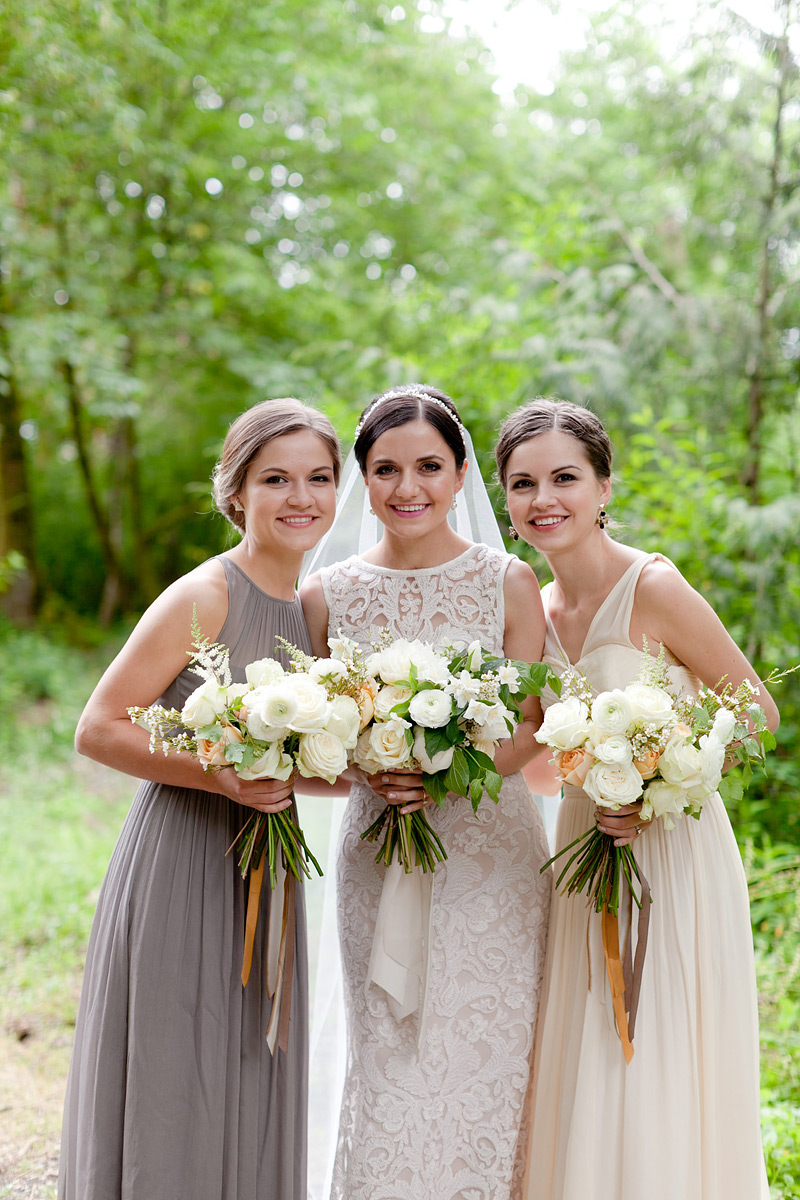
My sister was married in May and was immediately whisked off to live in Ohio. This day was absolutely glorious, but at the same time bittersweet. It’s hard not having her around. I miss her little face like nothing else. At the bottom of this post, there’s a photo of us sisters that I absolutely adore. I love those sisters of mine with all my heart and I’m happy they each found the one they love. See my sister’s engagement photos here and detail shots of their wedding invitation suite that I got to design here.


Photography: Linnea Paulina
Florals + Styling: Kae + Ales
Venue: Historic Deepwood Estate
Stationery: Anastasia Marie
Bride’s Dress + Veil: BHLDN
Bridesmaid Dresses (us sisters): J.Crew
August 4, 2015
Filed Under : Gift Wrap + Packaging - Paper Projects
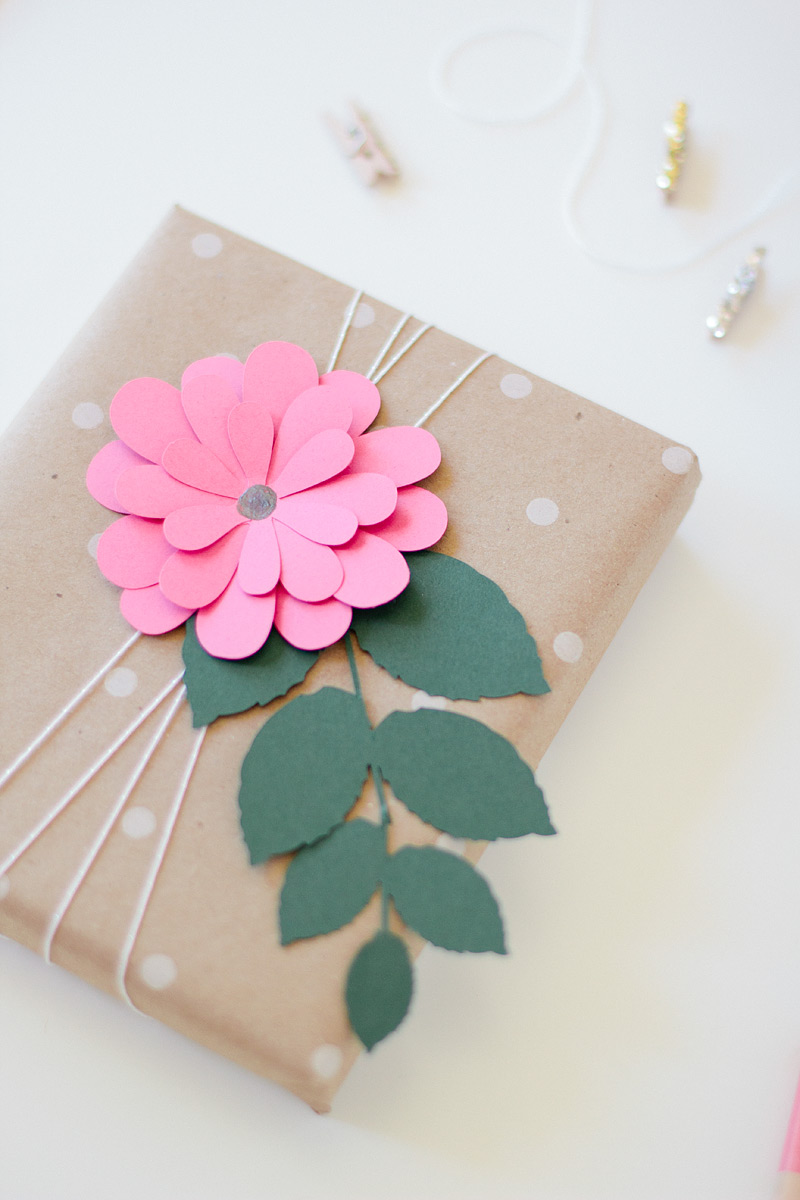
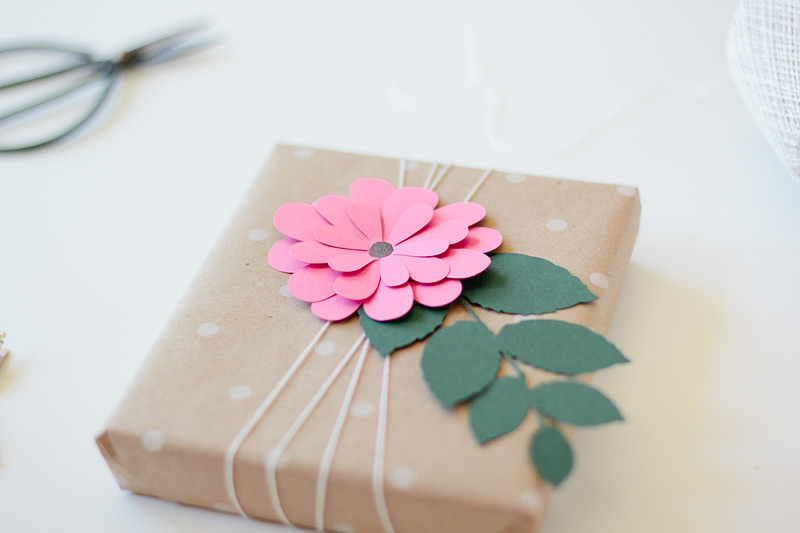
I personally never liked the color pink, but when it comes to paper flowers, pink just seems to give the right amount of pop without going overboard. In this case, I’d call it the pink of peonies. To recreate this gift wrap idea, you’ll need the following supplies:
White and kraft polka dot wrapping paper (I found this one at Target)
Pink cardstock
Green cardstock
White iridescent twine
Gray shimmer paint
Double-sided tape
Scissors
Glue
Puff tape
Start by wrapping your gift with the wrapping paper and sealing with the double-sided tape. Take your twine and wrap it around the box a few times; secure in the back with a knot. Now take your pink cardstock and cut out three flower petal shapes. I chose a six petal silhouette and cut out all three in different sizes. It creates the best layered look that way. Secure them together with a dab of glue, layering them by size — and then dab a bit of your paint on top of the assembled flower in the middle to complete the bloom. Next, cut out a leaf silhouette from the green cardstock. Use puff tape to secure the leaf and the bloom onto the wrapped gift and now you’re ready to roll! If you wanted to, you can also add a burlap gift tag for the final finish.

July 30, 2015
Filed Under : Palettes
