Baby Girl on the Way

December 14, 2012

Filed Under : Invitations - Paper Projects

baby shower invitation - anastasia marie

One of my friends is having a baby! I’m always giddy about these things and was even more giddy when she asked me to put together some holiday-themed baby shower invitations. I usually wait until after an event happens before I put up the invitations, but I’m going to have to make an exception for this one because it’s Christmas-y and if I don’t put it up today, it won’t be able to go up until after the New Year. That will certainly not do! So here you are…

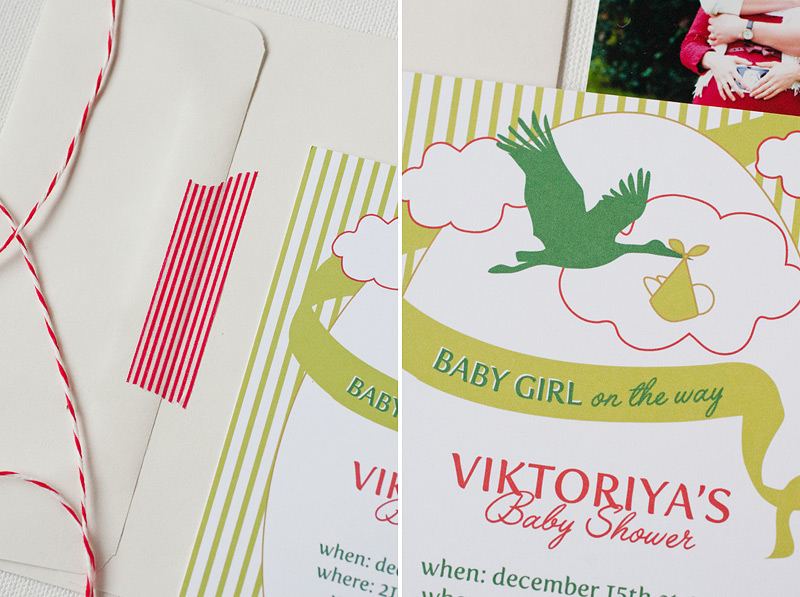
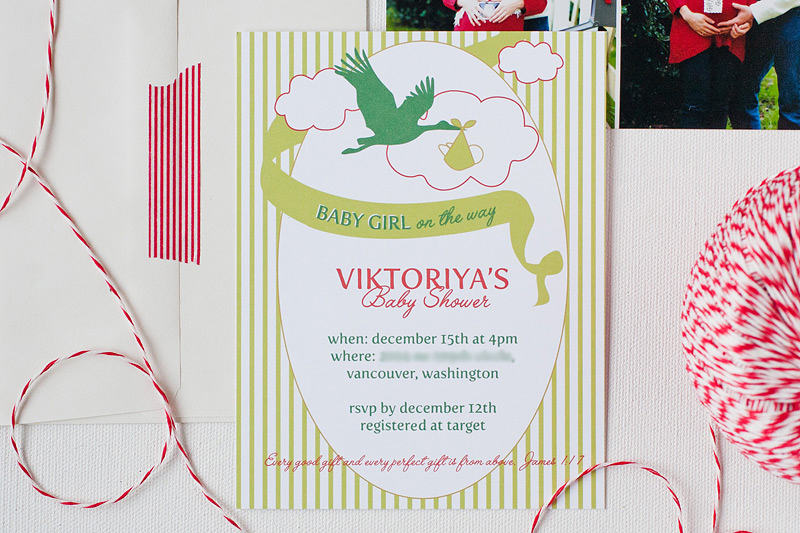
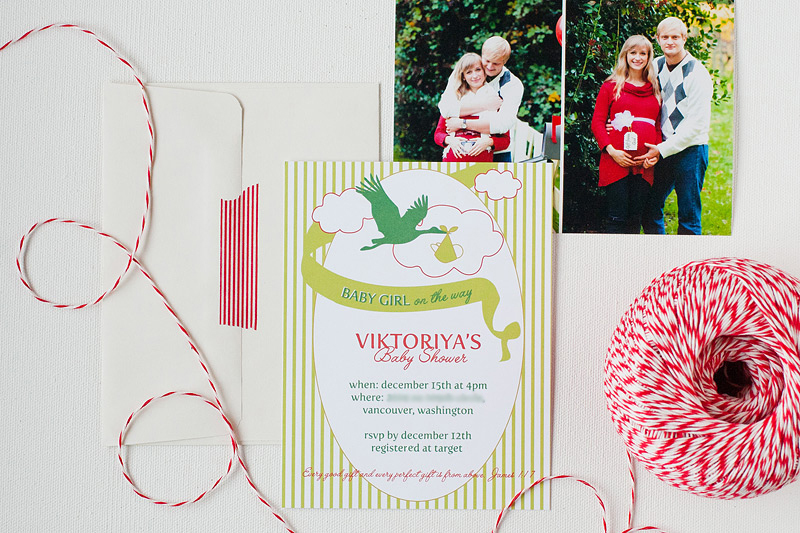
Printed on smooth white cover paper, the mother-to-be requested a crane flying a baby and a little ribbon announcing the pending arrival. With green and red as the color scheme, we wrapped it up with a beautiful verse from the Bible that says it all: James 1:17 – “every good gift and every perfect gift is from above.”

baby shower invitation - anastasia mariebaby shower invitation - anastasia marie

DIY: Gift Card Holders

December 12, 2012

Filed Under : DIY - Gift Wrap + Packaging - Paper Projects

Wrapping up Christmas gifts is one of my most favorite things to do during the holidays. I’m sure many of you can join in on that with me. The gift that always gets left in the dust it seems is the gift card. I do gift these to people quite often, so I try to present them as prettily as I can. This year, I will be giving out some, so I made some cute little envelopes and am showing you below how to make your own.

1   Cut your holiday paper into 5×4.25″ sized sheets.

2   Score the sheet in three areas: 1 3/8″ from each side and 3/4″ from the bottom. You’ll see a chart above that shows the lines you’ll need to create (yellow dashed lines).

3   Make your flaps by cutting in the designated areas shown above in the same chart (blue dashed lines).

4   Dab some glue on the right flap and fold the left flap over it. Dap some more glue on the bottom flap and fold that one over the other two. You’ll find that you used sturdy paper, getting them to stick together will take a little longer than if you used a lighter weight paper.

5   Cut a finger slot with a pair of scissors or a punch tool.

Embellish the gift card holders some more by adding baker’s twine or some other festive tidbit.

It’s A Giveaway!

December 7, 2012

Filed Under : Giveaways + Specials

It’s the season of giveaways and there’s one going on right now over on the Michaela Noelle Designs blog! So head on over there for your chance to win the goodies from my shop that are pictured above: a set of ten mini gift tags, a set of ten speckled gift tags, one custom initials heart rubber stamp, one washi-inspired striped rubber stamp, five yards of metallic gold fringe cord, and one Cardinal holiday papercut card. Combined, that’s a package worth $40 that could be sent your way!

NOTE: I disabled the comments section for this post since any comments left on my blog will not count towards winning the giveaway. The whole giveaway is being hosted by Michaela Noelle and she will be the one choosing the winner. Please do not attempt to participate in the giveaway through my blog. All entires should be made on the Michaela Noelle Designs blog.


DIY: Glitter Ribbon Garland

December 5, 2012

Filed Under : DIY

As you saw in yesterday’s post on my birthday party decor, I made a ribbon garland out of glittery holiday ribbon. I bought the ribbon at JoAnn and set to work a couple days before the party. Besides the ribbon, all you need is some white cotton string, double-sided tape or tacky glue, and a pair of scissors. I used double-sided tape for mine — it held pretty good because my ribbon was very lightweight and smooth where I placed the tape but if the ribbon you get is heavier or has glitter on both sides of the ribbon, the tacky glue will probably be a better option for you.

How it works: Cut your ribbon into various lengths, fold each piece over the string and make a crease. Unfold it, apply your tape or glue onto both the ribbon and the string, and re-fold. Pinch the fold to give it a more tighter seal. I used mainly gold and a lighter gold for my garland with bits and pieces of silver simply because I didn’t buy enough ribbon, but it still turned out so well. Enjoy making yours!